Smart life hacks for the electrician: working more efficiently and safely
Electrical work requires precision, patience, and a keen eye for safety. Whether you are a novice professional looking to speed up your daily routines, or a serious DIYer wanting to get a job done professionally at home: smart working methods make a big difference. By applying proven work methods, you can save time and prevent mistakes without compromising on quality.
In this article, you will find an overview of practical tips and insights straight from the experience of seasoned installers. We discuss how to work more efficiently, debunk persistent myths, and show you how to make the most of modern tools.
Contents
- Safety and NEN 1010 standards in practice
- Efficiently finding faults with the halving method
- Smart tips for pulling cables through a conduit
- Why dish soap is a poor choice of lubricant
- Handy tips for using wire connectors safely
- Efficiently organizing a junction box using folding techniques
- The truth about cable reel overheating
- Ergonomic hacks on the job site and tool organization
- Setting up a company van for an electrician: calm and overview
- Frequently asked questions about efficient and safe installation work
Safety and NEN 1010 standards in practice
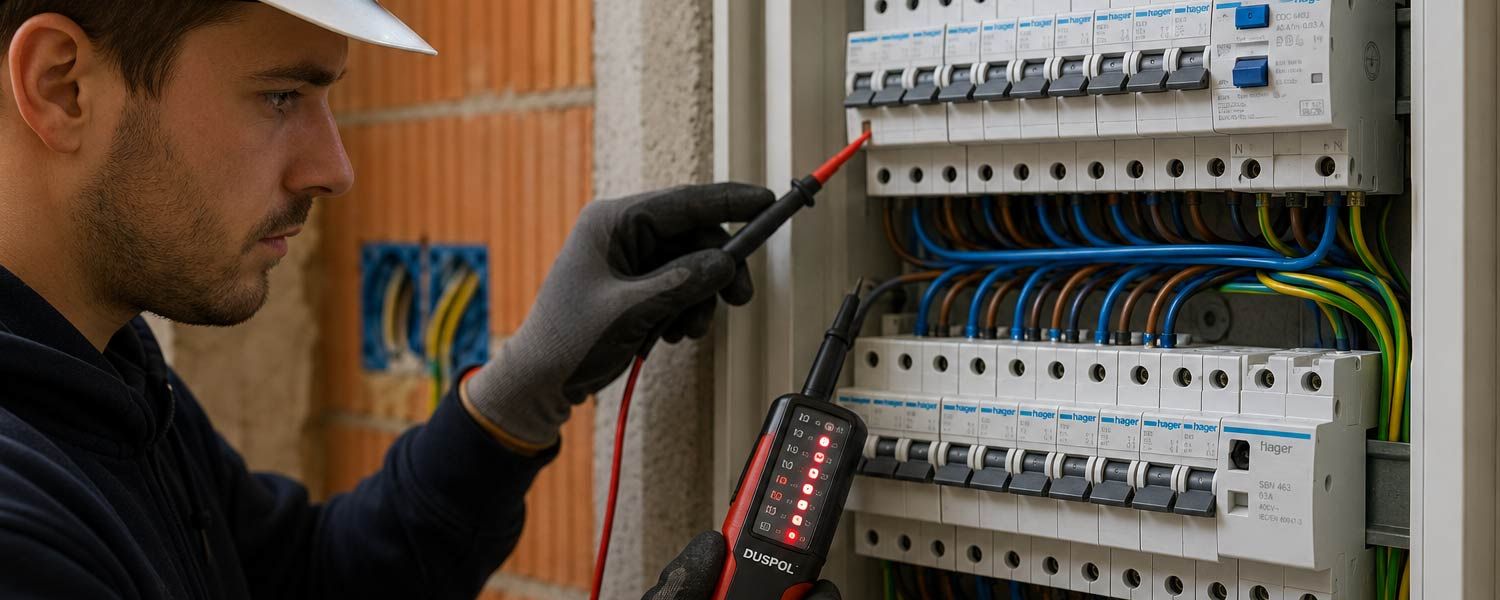
Safety is a top priority in electrical work. It is unwise to blindly trust a light switch when you are about to work on a circuit. Switch off the relevant circuit breaker in the panel and verify that the power is off using a reliable two-pole voltage tester or a multimeter.
The NEN 1010 safety standards exist for a reason; they protect both the installer and the end user from the risks of electric shock and fire. Therefore, make sure you work with VDE-insulated tools certified for work up to 1000 volts. In addition, it is wise to work on a non-conductive ladder, such as a wooden or fiberglass model, to minimize the risk of grounding in the event of contact.
[!IMPORTANT] Always test for voltage directly at the location where you are working. First, test on a known live source to verify that your tester is functioning correctly, then test the wires you are about to work on, and finally, verify the tester once more on the live source.
Efficiently finding faults with the halving method
Locating an earth fault or short circuit in an extensive installation can be a time-consuming job. Many installers start by disconnecting every individual outlet or appliance, which is physically demanding and takes a lot of time. A more systematic approach helps you locate the cause faster.
When fault finding with the halving method, you systematically divide the problematic circuit in two. You disconnect the connection at the exact midpoint of the circuit and then measure which side the fault is still on. By repeating this step in the remaining faulty section, you halve the search area each time.
With this method, you significantly reduce the number of components you have to unscrew. Instead of opening ten back boxes, for example, the halving method often means you only need to inspect three or four to find the source of the fault. This not only reduces search time but also limits the risk of damaging switchgear or wiring.
| Number of connections in circuit | Traditional fault finding (average number of steps) | Halving method (maximum number of steps) |
|---|---|---|
| 8 | 4 to 8 steps | 3 steps |
| 16 | 8 to 16 steps | 4 steps |
| 32 | 16 to 32 steps | 5 steps |
[!TIP] For complex faults, use the halving method to quickly narrow down the search area and minimize the physical strain of disassembly.
Smart tips for pulling cables through a conduit
When installing new wiring, pulling cables through a PVC conduit can sometimes be difficult, especially when there are sharp bends in the run or when you are working with corrugated flexible conduit. A handy method to prevent snagging is to cut the ends of the wires at an angle before attaching them to the fish tape.
By cutting the wires in a staggered pattern and then wrapping them tightly with electrical tape, you create a streamlined tip that glides smoothly through bends and past any imperfections inside the conduit. When finishing, make sure to leave about 10 to 15 centimeters of extra length at both ends of the conduit. This length gives you plenty of room to make the connections comfortably and without tension on the wires inside the junction box.
If a standard fish tape won’t make it through a complex flexible conduit run because of all the ribs and bends, the vacuum cleaner method often provides a solution. Tie a small piece of sponge or foam rubber to a thin but strong kite string or mason’s line. Place the vacuum cleaner nozzle on the other end of the conduit and suck the sponge with the string through it. You then use this string to pull the heavier fish tape, or the cables directly, effortlessly through the conduit.
[!TIP] Pulling wires usually goes smoothest with two people: one person pulls gently and steadily on the fish tape, while the other feeds the wires neatly and without kinks into the conduit.
If you are pulling multiple wires to the same junction box, color-code the conductors with electrical tape or number them at the start. That way, at the end point you can immediately see which wire belongs to which connection, without having to test each conductor afterwards.
Why dish soap is a poor choice of lubricant
On various DIY forums, people often recommend using household dish soap or liquid soap to guide stiff wires through a conduit more easily. Although this might seem like a cheap and effective solution at first glance, professional installers strongly advise against it.
Dish soap contains chemical components and acids that can degrade the plastic sheath of the wiring (PVC) over the long term. This can lead to drying, cracking, and ultimately insulation failures or short circuits. Furthermore, dish soap dries into a sticky, hard substance. If you want to replace a wire or add an extra one in the future, you will find that the wires are completely stuck inside the conduit.
Instead, use a special, certified wire pulling lubricant or talcum powder. Professional cable lubricant is chemically neutral, does not damage the insulation, and dries without leaving a sticky residue.
Handy tips for using wire connectors safely
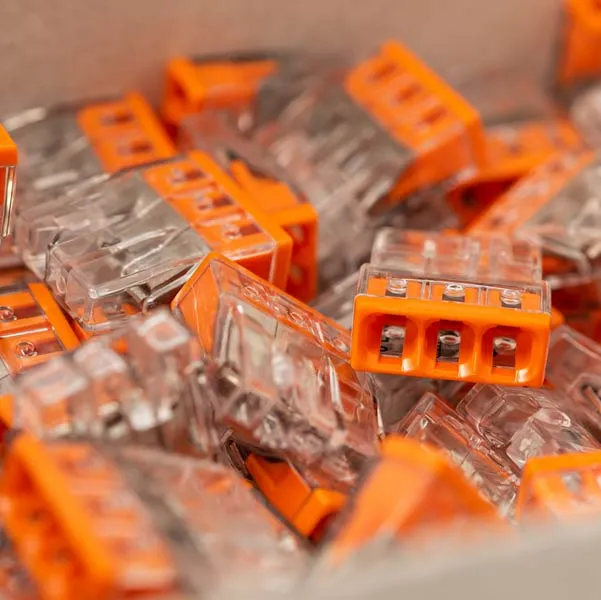
Modern lever wire connectors (such as the well-known Wago 221 series) have replaced traditional twist-on wire connectors in many installations. They are faster to use, suitable for both solid and stranded conductors, and allow for easy visual inspection thanks to their transparent housing.
Handy tips for using wire connectors safely:
- Use the built-in strip guide: You don’t have to guess the correct amount of exposed copper. You can determine the exact strip length for a Wago connector simply by holding the wire against the strip length guide on the side or back of the connector. This is usually 11 millimeters.
- Prevent exposed copper: Ensure that no bare copper is visible outside the connector after insertion, and that the wire insulation goes all the way into the connector up to the stop.
- Use the test slot: Almost every modern wire connector features a small test slot on the back or top. You can place the probe of your voltage tester here to take measurements without having to disconnect the wire.
The standard (NEN 1010) states that all electrical connections must remain accessible for inspection and maintenance at all times. Plastering over or permanently sealing a junction box is therefore not permitted.
Comparison: traditional twist-on wire connectors vs. modern lever connectors
| Feature | Traditional Twist-on Connector | Modern Lever Connector (e.g., Wago 221) |
|---|---|---|
| Suitable for flexible/stranded core | No (solid conductors only) | Yes (both solid and stranded conductors) |
| Reusability | Very limited / not recommended | Yes, easy to open and close |
| Visual inspection | Impossible (opaque material) | Yes (fully transparent housing) |
| Installation speed | Slower (manual twisting required) | Very fast (simple insertion and clamping) |
Efficiently organizing a junction box using folding techniques
An overcrowded junction box can make mounting a cover plate or light fixture difficult. To organize a junction box efficiently, it is recommended to use a systematic folding method.
Instead of stuffing the wires randomly into the box, it is best to bend them into an accordion shape (a ‘Z-fold’) before pushing them to the back. This keeps the wires neatly layered at the back of the box, leaving plenty of space in the center for the wire connectors and any additional components, such as a dimmer module. This method also prevents excessive mechanical tension on the terminal connections, which improves the reliability of the installation.
[!TIP] Use a permanent marker to write the circuit number on the back of the junction box cover or the faceplate. This will save a lot of troubleshooting time during future maintenance or faults.
The truth about cable reel overheating
There is a persistent misconception about why a coiled cable reel heats up under load. Many people think that the coiled cable acts as a coil and that heat is generated by electromagnetic induction. From a physics standpoint, this is incorrect. Because the live (phase) wire and the neutral wire lie directly next to each other inside the sheath and carry current in opposite directions (bifilar winding), their magnetic fields almost completely cancel each other out. Therefore, there is no significant coil effect.
The actual cause of overheating is purely thermal buildup (heat accumulation). Every current-carrying copper wire has a certain electrical resistance, which releases heat under load. When the cable is fully unreeled, this heat can easily dissipate into the surrounding air. However, if the cable remains tightly wound on the drum, the heat is trapped between the various layers of plastic and rubber. As a result, the temperature in the core can quickly rise to 65 °C or higher, causing the insulation to melt and potentially leading to a short circuit or fire.
[!WARNING] It is highly recommended to fully unreel a cable reel when connecting high-power appliances (such as a lawnmower, pressure washer, or space heater). Therefore, always unroll a cable reel to prevent damage to the cable.
Ergonomic hacks on the job site and tool organization
Efficiency is not just about the electrical connections themselves, but also about how you strain your body and organize your tools during a long workday.
- Headlamp with Velcro: A headlamp is indispensable when working in dark corners or crawl spaces. To prevent the elastic band from slipping off your hard hat when you bend forward, you can stick a few pieces of self-adhesive Velcro onto your helmet and the back of the lamp mount.
- Magnetic aids for hollow wall installation: Need to pull a cable behind a drywall? Attach a small metal ring or a piece of chain to the end of your fish tape or cable. By then moving a strong neodymium magnet over the outside of the drywall, you can easily guide the chain on the inside to the desired opening.
- Organizing your tool belt by weight: Carry your most frequently used tools such as wire strippers, side cutters and voltage tester on the side of your dominant hand. Consumables like wire connectors and tape are best kept on the other side. This minimizes unnecessary reaching and relieves strain on your back and shoulders during intensive workdays.
Setting up a company van for an electrician: calm and overview
A large part of your daily time savings is not achieved on the ladder, but begins with the preparation in your van. Repeatedly searching for that one specific screw, wire connector, or pair of pliers unnoticeably costs hours per week and increases your mental workload. So set up your company van ergonomically to prevent physical complaints. Preferably place heavy tool cases and materials low and as close as possible to the sliding door or rear doors. This way, you don’t have to reach deep into the van or lift heavy loads in an unnatural posture. In addition, use modular storage systems with transparent bins for small parts such as wire ferrules, screws, and wire connectors. Give each type of tool and material a fixed, labeled spot. This not only ensures that you can see at a glance when stock needs replenishing, but also prevents loose materials from shifting and getting damaged while driving.
[!TIP] Make sure frequently used and heavy materials are easily accessible, and work with fixed, labeled storage compartments. This eliminates search time and lets you start every job with calm and overview. By applying these simple yet effective working methods, you will not only work faster and more safely, but also ensure that your installation work meets professional quality standards.
By applying these simple yet effective working methods, you will not only work faster and more safely, but also ensure that your installation work meets professional quality standards.
Frequently asked questions about efficient and safe installation work
Which voltage tester is most suitable for daily use?
For professional use, a reliable two-pole voltage tester is the most suitable choice, optionally supplemented with a multimeter. These testers give a reliable result where a simple neon-screwdriver-type tester falls short. Always measure using a fixed routine: first on a known live source, then on the wires you are about to work on, and then again on the known source, so you are sure your tester is functioning correctly.
Why are modern wire connectors more convenient than traditional twist-on connectors?
Modern wire connectors such as the Wago 221 series work with a clamping lever and constant spring pressure instead of a screw or twist connection, so the connection cannot come loose due to vibrations or temperature fluctuations. They are suitable for flexible conductors from 0.14 to 4 mm² and for solid and stranded conductors from 0.2 to 4 mm². Thanks to the transparent housing, you can check at a glance whether the conductor has been stripped far enough, and the test slot lets you take measurements without disconnecting the connection.
How do I prevent a fish tape from getting stuck in a conduit?
Use a special, certified cable lubricant (preferably water-based) and avoid sharp bends in the run where possible. Never use dish soap or soap, as these degrade the cable sheath over time and can make the wires stick. For very stiff or complex runs, the vacuum cleaner method offers a solution: suck a small sponge on a string through the conduit and use that string to pull the fish tape or cables through.
What is the advantage of the halving method for fault finding?
The halving method halves the search area of a fault at every step. As a result, you have to disassemble considerably fewer components and back boxes, which saves a lot of time and reduces physical strain. In a circuit with 32 connections, you can often pinpoint the source of the fault within five steps.
How often should an electrician’s tools be inspected?
Professionally used electrical tools and measuring equipment must be inspected periodically in accordance with the applicable safety standards (such as NEN 3140 for safe operation). In practice, this is usually done annually, depending on the risk assessment and the intensity of use.
Why is extra wire length in the junction box important?
By leaving 10 to 15 centimeters of extra length on both sides and placing the wires with a generous loop (a service loop) at the back of the box, you prevent mechanical tension on the connections. This also leaves you enough wire in case an adjustment or repair to the switchgear is needed in the future.